


Your guide to the Moov ACH Test Harness
The Moov ACH Test Harness project provides a configurable FTP/SFTP server to replicate real-world ACH file transfer scenarios like returns and changes. With the test harness acting as a receiving financial institution, matchers and actions can be customized to observe how ACH files would be processed in production. This project is a natural extension of our Moov ACH project, which allows users to read, write, and validate Nacha ACH files. We’ll cover how to get set up with the test harness and run through a few primary use cases in the sections below.
Background
By simulating a receiving institution for ACH files, the test harness allows users to perform end-to-end tests. Once a file is uploaded to the service, it’s checked against a number of filters, or matchers, defined in the project’s configuration file. Each matcher has a corresponding action that will execute if the match is successful. Note that only the first detected match is actionable, and combining multiple match parameters (within a single matcher) results in more specific filters.
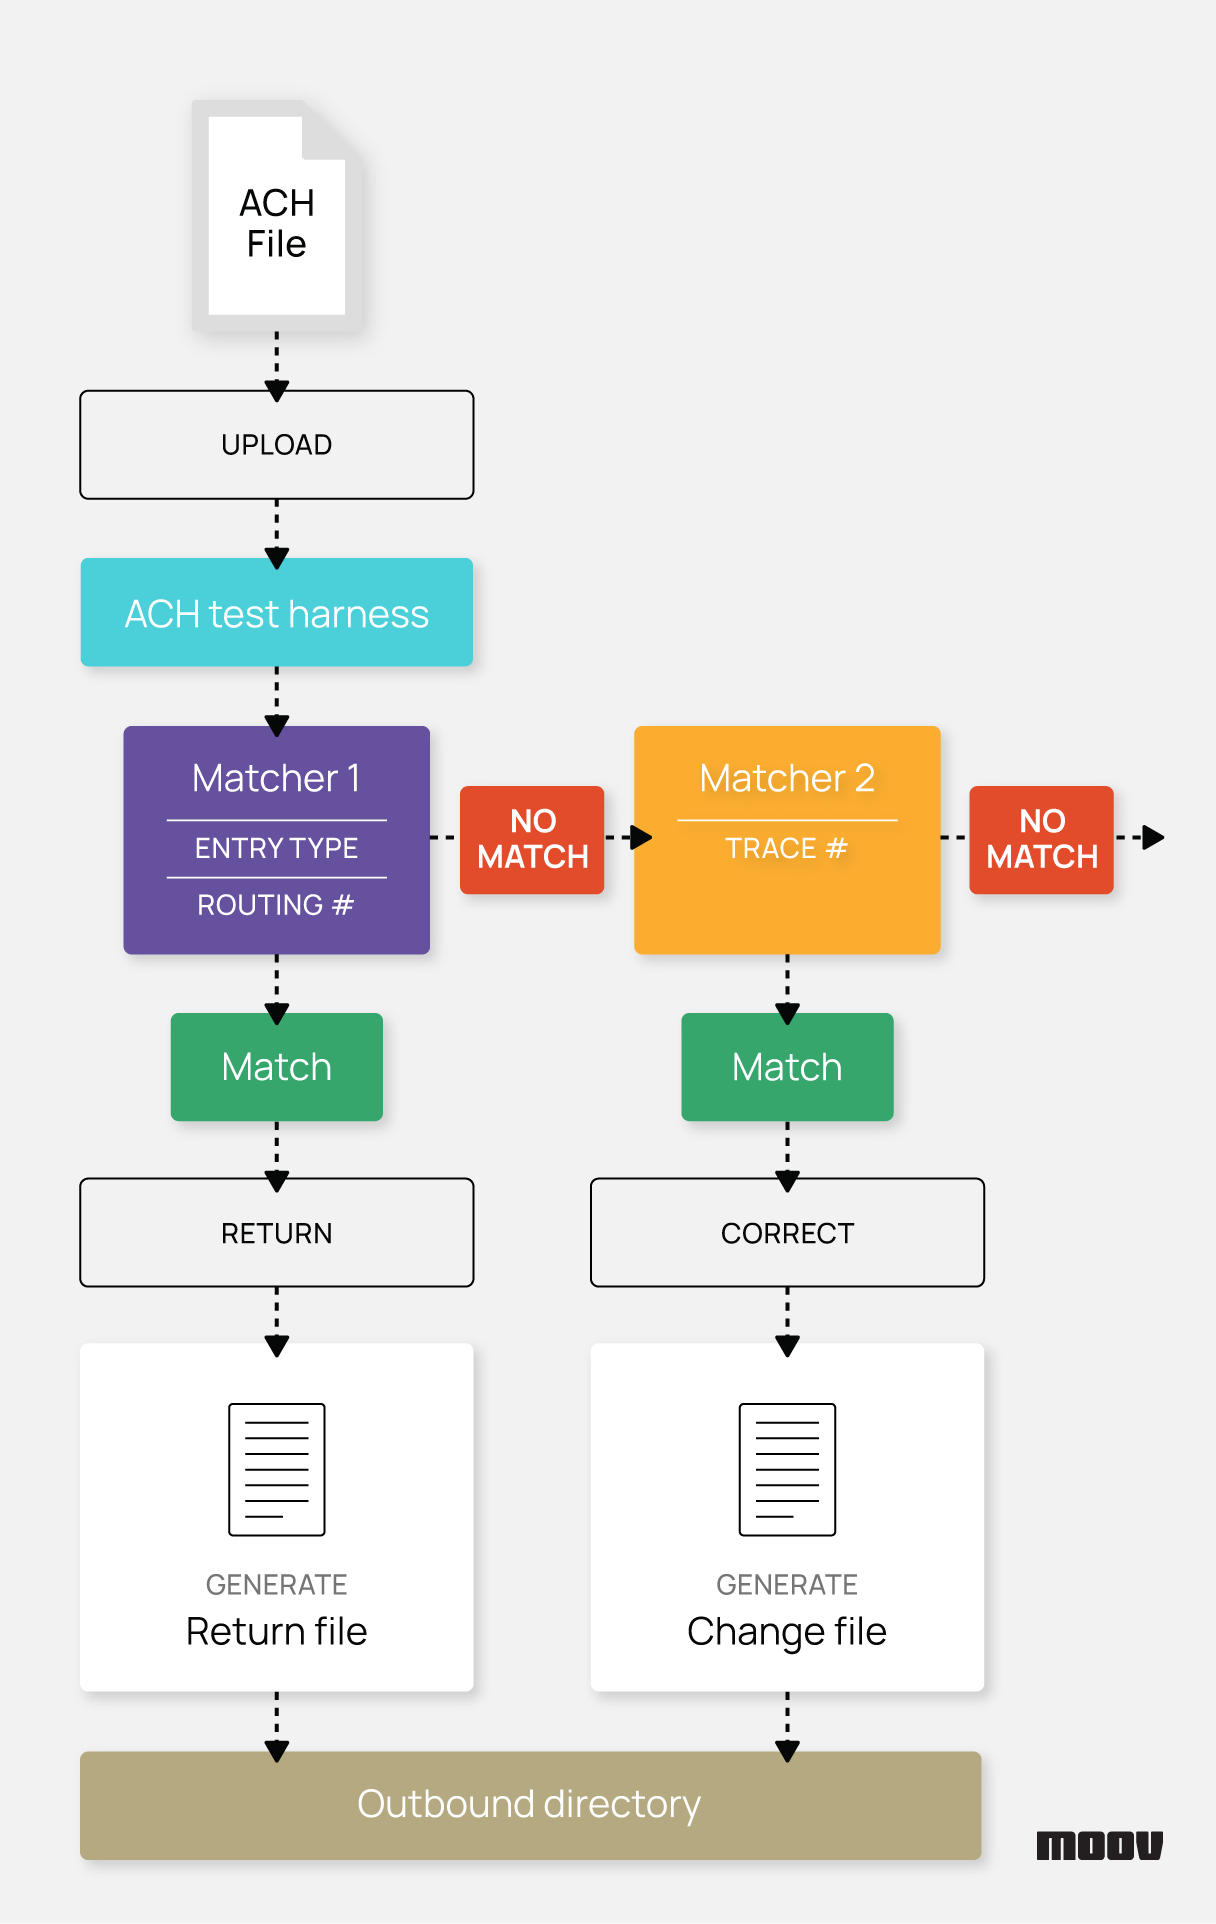
Match parameters include transfer amount, entry type (credit or debit), account number, routing number, and more. Actions include copying a matched file to a directory, generating a return file, and generating a notification of change file. We will be adding more matchers and actions over time, and encourage community feedback on what would be useful.
Initial setup
To get started with the test harness, first install Docker on your system and clone the project. From the main project directory in your terminal, run docker compose up. This step may take a minute to complete and will run the latest image on port 2222 with Prometheus metrics on port 3333.
To ensure the service is active, you can ping it with curl localhost:2222/ping. If it’s up and running, you’ll receive 220 Welcome to the Go FTP Server. Otherwise, you’ll see something like Failed to connect to localhost port 2222: Connection refused.
Next, download and run an FTP client like Filezilla. Connect to the test harness with a username of admin and password of secret.

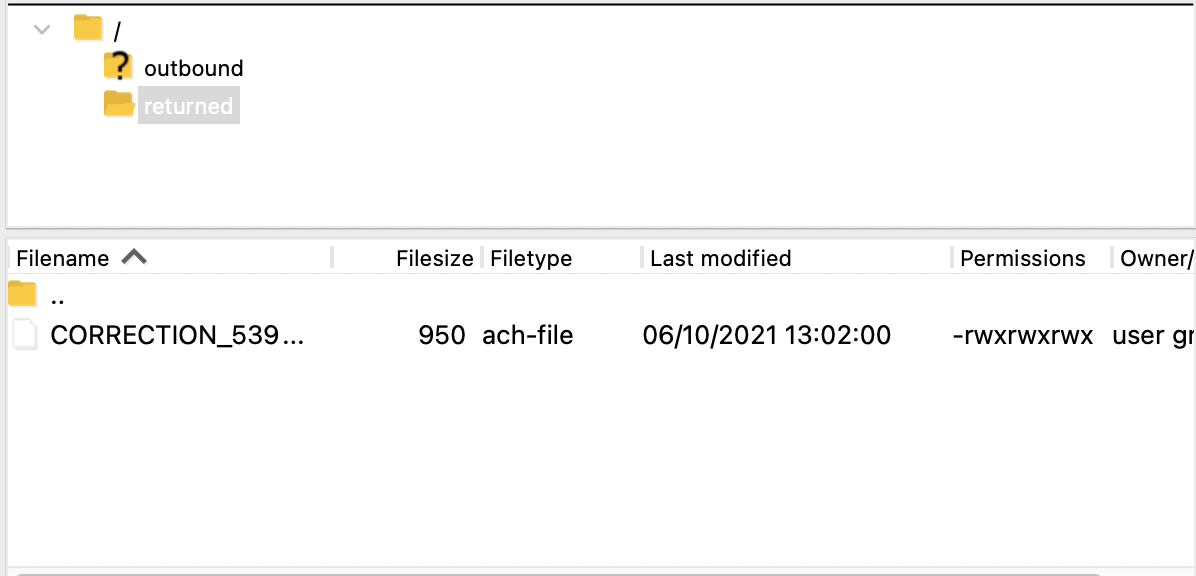
Once a connection is established, you’ll see a couple folders appear under the remote directory. Try uploading examples/utility-bill.ach by dragging and dropping it from your local directory to the remote directory. This file will have a match based on the default config, which triggers a correction action. As a result, a change file will be generated and appear in the folder named returned.
Configuring matchers and actions
The configuration file at examples/config.yml is where you can set matchers, actions, login credentials, paths, and other information. We currently allow two outbound paths defined under Files and Return. Copied files appear in the Files path, while newly-generated change and return files are located in the Return path. Let’s take a look at a few example scenarios.
To return debits with an amount between $1,000 and $1,200:
- match:
    entryType: "debit"
    amount:
      min: 100000 # $1,000
      max: 120000 # $1,200
  action:
    return:
      code: "R01"
To correct files that match a specific trace number:
- match:
    traceNumber: "121042880000001"
  action:
    correction:
      code: "C01"
      data: "744567899"
To copy credits that match a specific account number and transfer value:
- match:
    entryType: "credit"
    accountNumber: "744-5678-99"
    value: 100000
  action:
    copy:
      path: "/outbound/"
Summary
We hope this walkthrough helps you get started with the ACH Test Harness and serves as a quick refresher for current users. If you have any questions or suggestions for the project, please contact the Moov team on Slack (#ach channel) or submit an issue.